If you want all your slides to contain design features such as common images (for example, your corporate logo), specific header and footer text, and so on, you can add those common items to your masters and they'll be shown on all your slides. Masters are part of your selected theme and are all about professionalizing your content formatting; for example, masters may determine that your corporate logo is always seen at the top-left of your slides or that all footers include a slide number and link to your website.
When you create a new presentation, it is typically associated with masters that were created by your administrator or were supplied out-of-the-box by Pyramid. The Content master is also typically enabled, meaning that it is used for all the body pages of your presentation. Note: If no masters have been created for your selected theme and canvas size, you can create a new master that is local to your presentation.
You can also enable or disable masters so they are used in your presentation as per your requirements and edit your masters locally; for example, to update your corporate branding across your presentation or to add some new legal text to all footers.
The following video demonstrates the use of masters in Present Pro:
Master types
Each theme may contain master pages that drive the design of the cover slide and content slides. When selecting a theme, any associated content master is automatically enabled. There are two types of master pages:
- Cover: The cover master is applied to the first slide in the presentation, making it the presentation cover slide.
- Content: The content master is applied to all subsequent slides, which make up the presentation content.
Manage masters
When you manage your masters, your changes (selections, edits, and so on) only affect the local presentation and will not affect the theme. The chosen theme colors will still be displayed, only the design elements of the master pages themselves will be updated.
Enable or disable masters
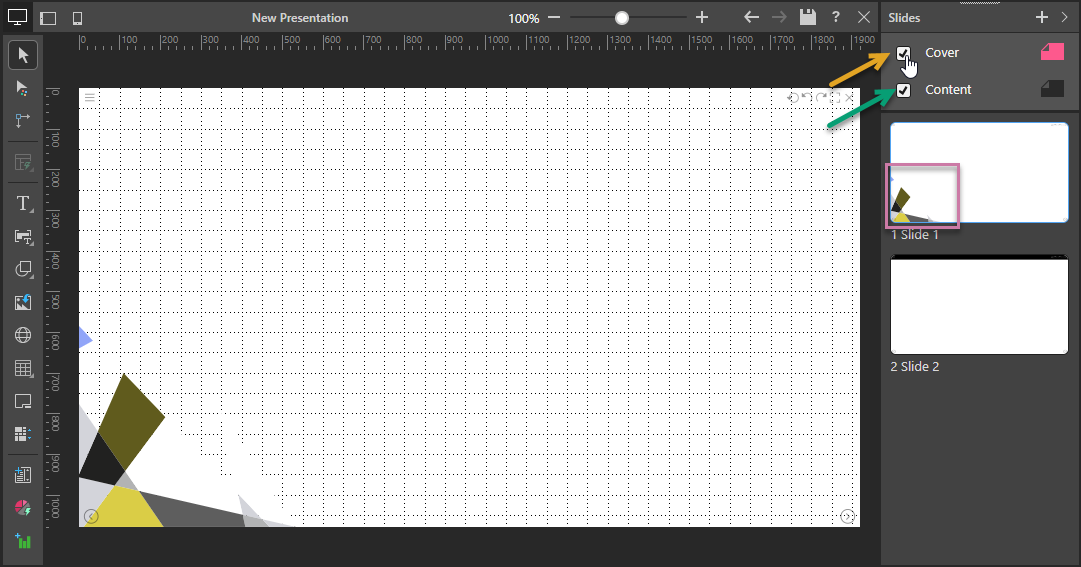
Select the checkboxes (yellow highlight above) to enable the masters for this presentation:
- Select the Cover checkbox to apply the Cover master to the first slide of the presentation.
- Select the Content checkbox to apply the Content master to all the slides in the presentation except for the cover. If Cover is not selected, but Content is selected, the Content master is used for all pages.
Note: If you clear both checkboxes, no master is used for this presentation at all. This removes background images, headers and footers, and so on from your slides but does not affect the chosen theme colors or your presentation's runtime options (the hamburger menu, redo, undo, and so on options, and navigation options).
Note: If the master checkboxes are disabled (if you cannot select them), there is currently no master for your presentation. This happens when you create a new presentation with a theme and canvas size that is not associated with a master. If you want to add master content, such as headers for every page or a particular canvas color, you should create a new local master for your presentation following the steps below.
Create new masters
If the theme you've chosen does not contain any master pages for presentations with your selected canvas size, you will not be able to select the masters in the Slides panel:
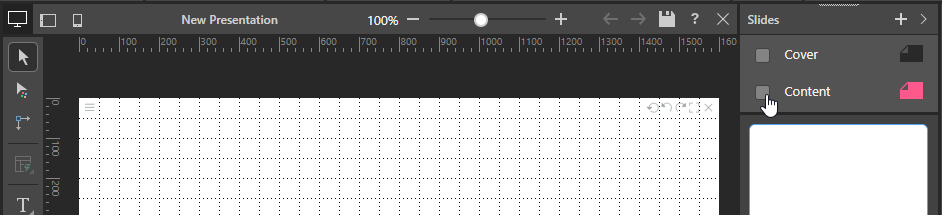
You can, however, create new cover and content masters on the fly, and then enable or disable those new masters as needed. The new masters are created locally following the same steps as editing your master.
Edit masters
Edit the existing master pages to change the content items and formatting that will apply to either the cover or every page of the presentation. Note that any changes to the master pages that are made using the following process are saved to this presentation only and not to the selected theme.
From the Slides panel:
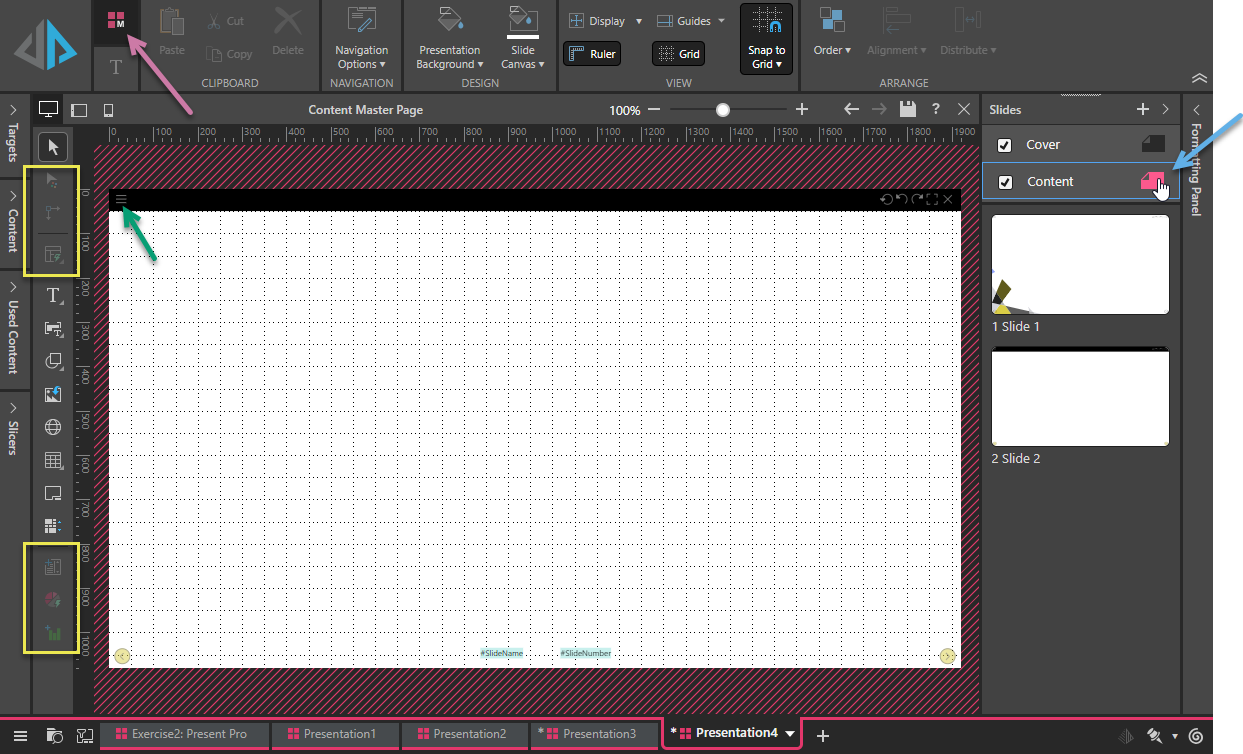
- Click the Slide icon alongside either Cover or Content to open the master on the canvas for editing (blue arrow below).
- Edit the content of your master as required. Remember! Changes to your Content master will apply to every page in the presentation apart from the cover. You might want to:
- Use the options in the Toolbox to add the content you want; this can be text boxes, shapes, imported images or logos, text fields, and more. The process that you use to add and position these items is the same as for a standard slide.
- Use the options on the Master and Component ribbons to add or edit the Navigation options, change the slide canvas or presentation background, and update the formatting details.
Note: While you are in master editing mode, you can move the navigation and other master-specific items around the canvas using drag and drop. For example, you can drag the Hamburger menu (green arrow) from the default top-left position to a different location.
- Once you are happy with your changes, click Save.
- Important! Make sure you turn off master editing mode by clicking on a slide in the Slides panel before you build your presentation. Anything added in editing mode will be added to the master and therefore to the cover or every page of your presentation.
You can tell you are editing the master on the canvas and not a page in your actual presentation, because a blue highlight is shown around the selected master type, the presentation background displays a hashed pattern (red lines), and the Master ribbon is shown above the canvas (purple arrow).
Note: Visuals and slicers cannot be added to the master. These options, auto layout, and the non-standard pointers, are all disabled when you are in master editing mode (yellow highlights below).